


Starting late in 2006, I began a quest to acquire tools like my shop had in the early 80`s. Unfortunately, the quality of tools available now and still within my budget didn't approach the quality of the tools I previously relied on. The solution was finding used or abandoned equipment that I could restore. This quickly grew into a passion (read that necessity) for restoring old, rusty, and badly treated machines with names like Rockwell/Delta, Powermatic, and Walker-Turner.
I discovered the Vintage Machinery web site in January of 2007, not an insignificant event! The Vintage Machinery site taught me how to take these old machines apart, clean them, paint them, and even how to replace their bearings. Additionally, I learned where to find manuals, parts lists, and, indeed, the parts themselves. I started to use the term "old arn" in reference to the old iron I was working with. I was constantly watching many possible sources for these machines. My bride was seeing yet another episode of her husband's ability to go completely overboard on a project!
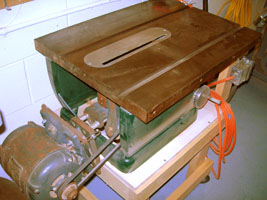
The first machine I located was an old Craftsman table saw in late 2006. One Craftsman table saw quickly became two, a good way to assure one functional machine. Full restoration was not undertaken on this machine in favor of waiting until I'm able to acquire the ideal vintage table saw. I did, however, clean this one and I painted the base. The paint color was determined by what was on hand. I apologize to the future owner for not maintaining the original color scheme. For me, the Craftsman is useful for what can be done on it rather than for its appearance. It has a one horse motor and a 10 inch thin kerf carbide blade which provides good cutting ability despite the lack of horse power. The fence is made from heavy angle iron and is clamped to the table with a pipe clamp; simple and effective. I continued to this this saw into 2008. I became increasingly dissatisfied with its flimsy table insert and lack of a fence.
The ongoing table saw journey......
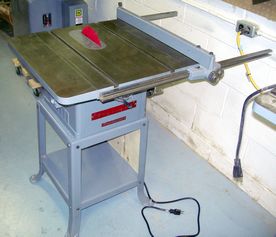 On September 8, 2008, the local Craig's List had a listing for an old Delta table saw. It turned out to be a Delta 34-500, 8 inch Tilting Arbor table saw (circa 1950). I decided to bring this one home and restore it to its former grandeur. It was disassembled so that the rust could be removed from every part. It was painted and had its bearings replaced. The electricals were upgraded to a magnetic starter.
This saw represents a smaller approach to table sawing but still provides the ability to rip up to 24 inches width. The table insert is much more solid and the iron top is a little wider. I installed a Freud LU83R008 8-Inch 40 Tooth ATB Thin Kerf Combination Saw Blade and made a test cut. The cut was smooth and quiet. I decided to retire the Craftsman for this one.
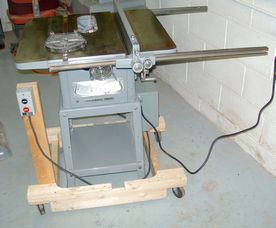
Just after having finished the resto of the 8 inch saw, an old Delta 34-600 9 inch Tilting Arbor Table Saw (circa 1970) fell into my lap from Craig's List. It was not as complete as the 8 inch saw but I decided to restore it because it could carry a larger diameter blade. It, too, was disassembled so that the rust could be removed from every part. It, too, was painted and had its bearings replaced. I moved the electricals from the 8 inch saw to the 9 inch saw. This saw should be quite workable for my needs. Time will tell.
Update 2010-03-10
The Delta 34-600 9 inch table saw has become my main production saw. I have a second one set up with a dado head dedicated to cutting tenons. The Craftsman has been sold.
Update 2010-06-10
 The Delta 34-600 9 inch table saw has been replaced by a 1959 Delta Unisaw as my main table saw. The Delta 34-600 9 inch table saw was kept and dedicated to tenoning.
 Update 2013-09-14
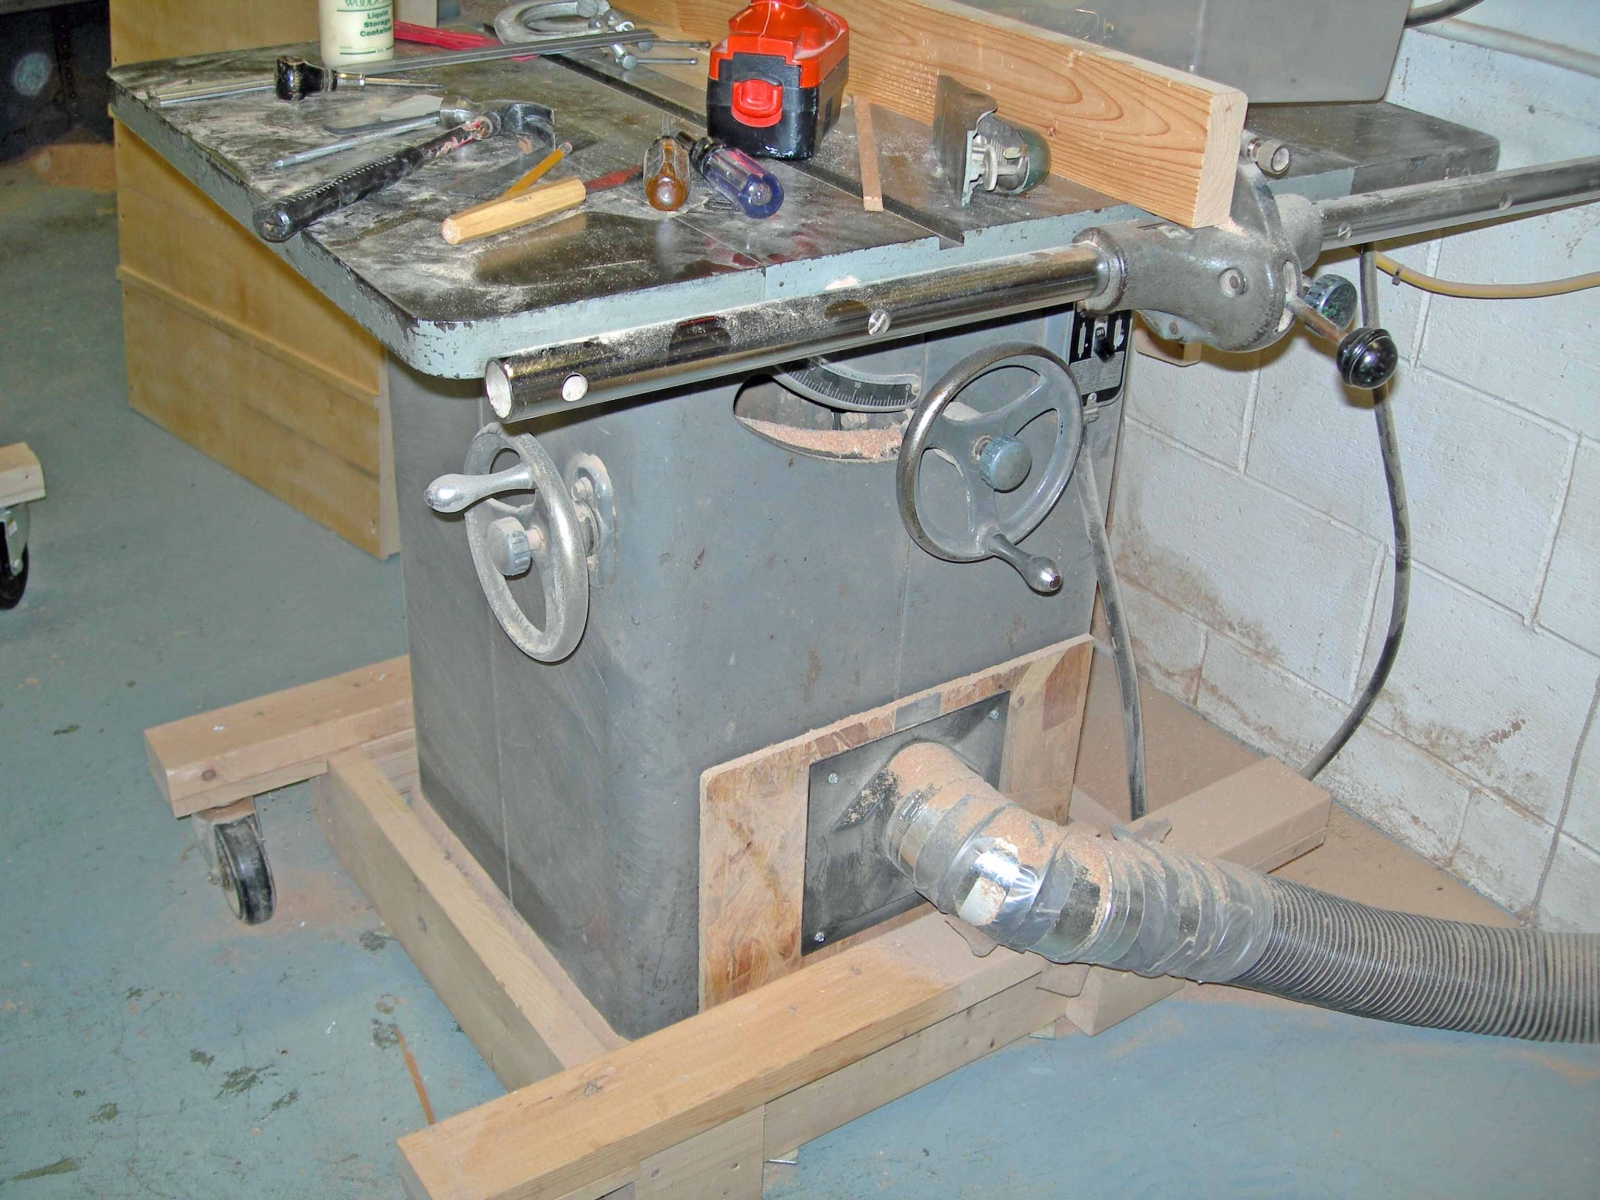
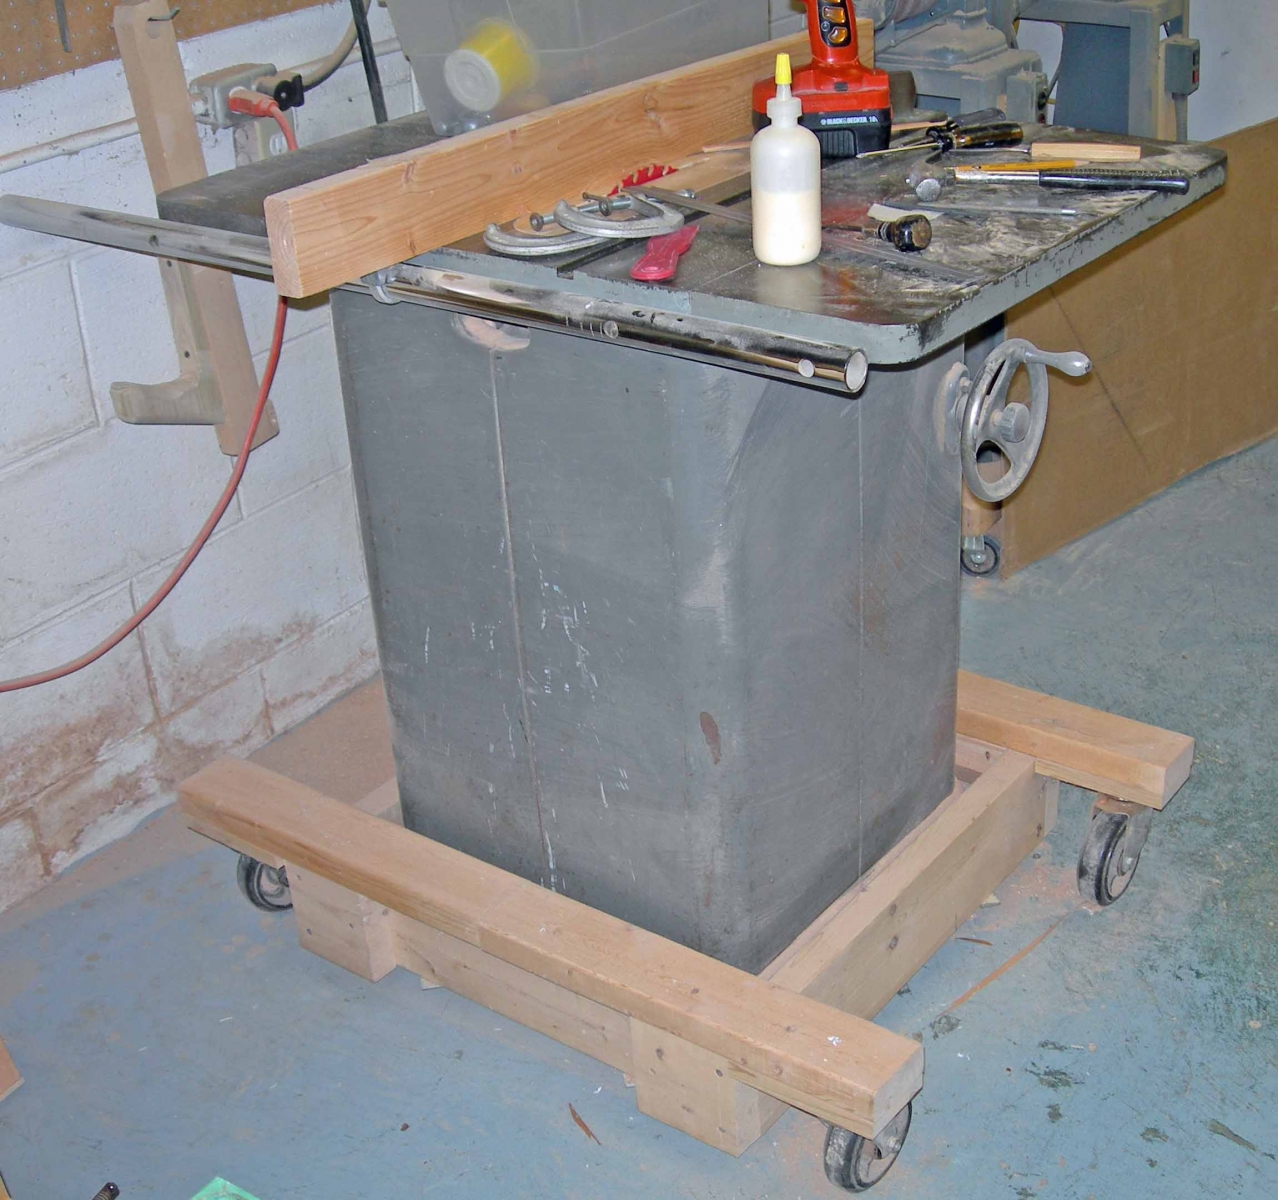
I brought home a 1967 Powermatic 66 table saw to be restored. This will replace the 1959 Delta Unisaw. The Unisaw sold quickly .
I brought in the PM 66 to gain right tilt capability.
 The restoration went well. I replaced bearings and cleaned/lubed machined ways. I kept the original paint. A brand new motor came with the saw. I purchased a modern magnetic starter. I was able to locate another CI extension so it would have one on each side of the table.
The companion tool to a table saw is the jointer, a tool that can put a perfectly flat face or edge on a board. I have always preferred the glue edge produced by a table saw blade to that of a jointer but the jointer is required to get the first straight edge. It took several tries before the jointer story was finished.

The gods of Arn came to the rescue and presented me with an opportunity to purchase the deluxe version of this model, the 37-290 4 inch jointer from 1973. Again, Craig's list was the vehicle. It was much better quality and still over thirty years old. It went through the entire refurb process and worked very well once it was reassembled. But I still yearned for a six inch jointer and kept steady watch for one to show up somewhere.
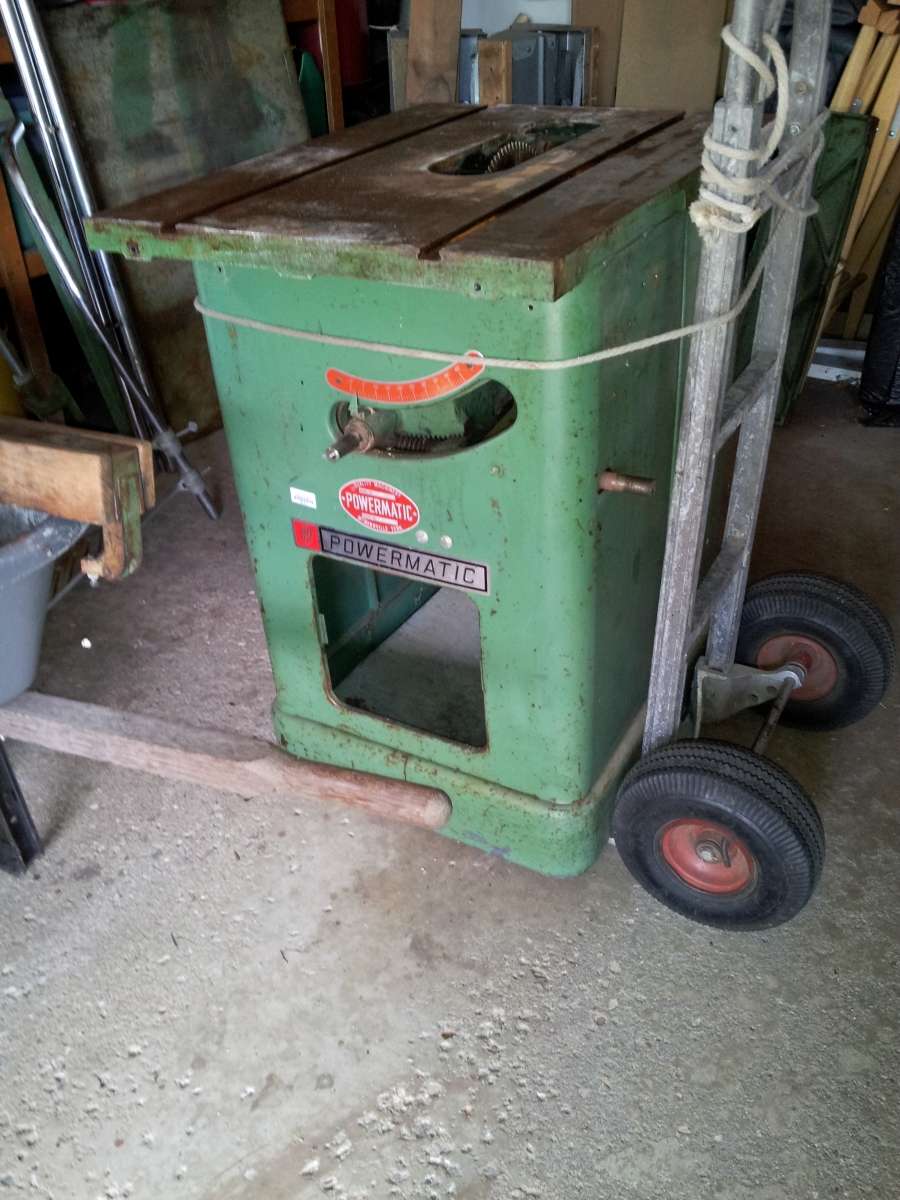
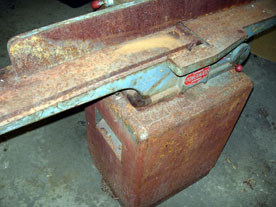 About six months after the 37-290 was put into service a Powermatic Model 50 6 inch jointer hit Craig's list. It was in frightful condition having sat on concrete, under a leaky tarp, for years. You can get an idea of what I was faced with from the picture. The rust was heavy everywhere. This was a prime candidate for a spooge tank which I learned about at OWWM.com. I set up three of varing sizes and had great success in getting rid of the heavy rust.
The spooge tank relies on electrolysis to reverse the process or rusting. It is slow but extremely effective. The process also removes paint quite nicely. The solution that the parts are immersed in is safe to touch and the electrical power required is low voltage so there is no worry of getting toasted. It is an economical process that produces great results. More about the process can be learned on the OWWM site.
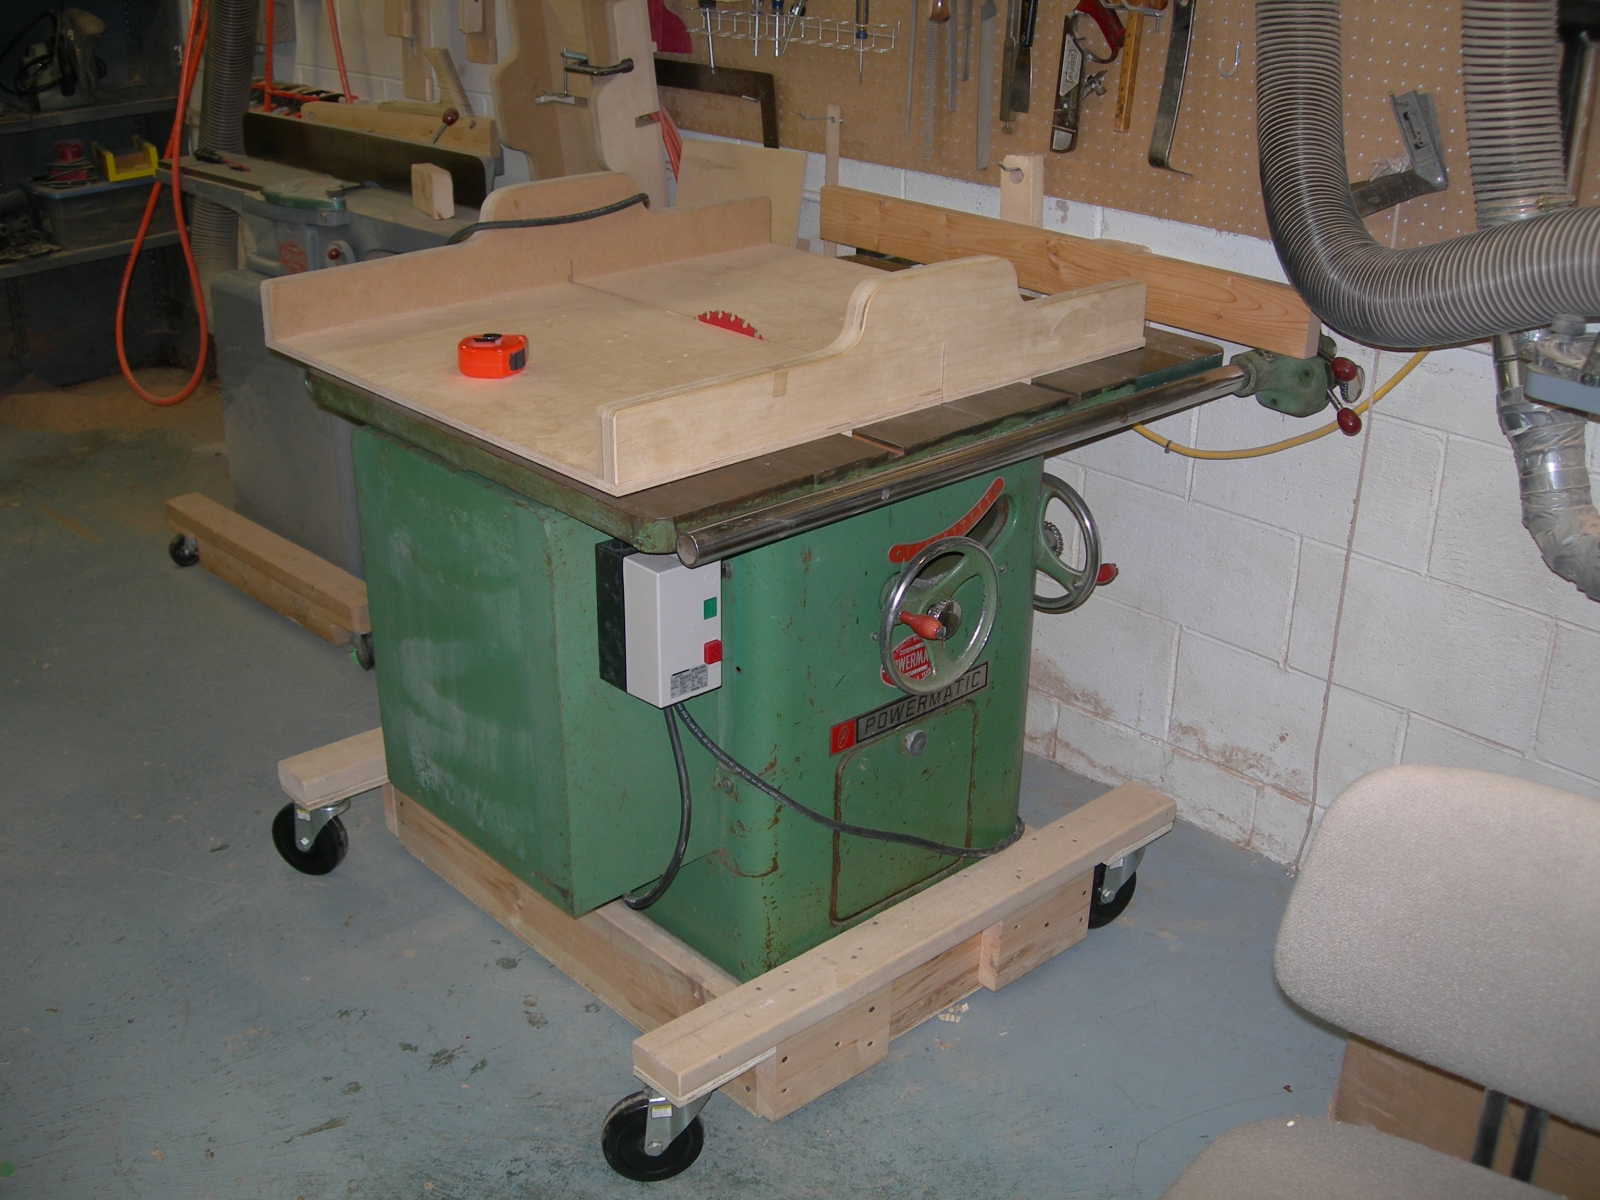
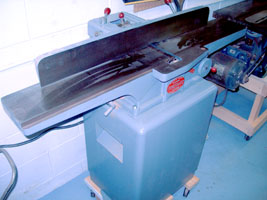 Each part was prepped for painting with care and then painted. I used gray because the machine had gray on it when I picked it up. During the stripping process there was no evidence that it ever was the usual Powermatic green. You would notice that in really tight areas, and under the nameplate, that get missed by those repainting a machine. Because of this and the serial number, there was speculation that it is a mid 50's vintage. New bearings were installed in the cutterhead and motor. The cutterhead also received new knives.
After assembly the work surfaces were waxed with carnuba paste wax. The jointer hummed beautifully when it was first turned on. The first joint was as smooth as silk. It has been a joy using this machine and I feel it was worth every hour of work. The remaining quest, for this machine, is to find a complete original cutterhead guard for it.
Back in the days of my original shop I had a Delta 17 inch drill press. I loved the versatility of that machine and the power it had. It even received one of those Mack bulldog hood ornaments that can be seen to this day on Mack trucks. The bulldog was mounted on the front of the drill press's upper belt guard. It was the one machine that I kept, just in case, when I closed the shop. It had been moved twice when I finally decided I would never need it again. It was sold along with a fortune in tooling for $100. I have lived to truly regret that decision. In 2007, I would manage to collect four Delta drill presses before I setteled down to the two that I found most useful.
 The first drill press appeared on Craig's list in mid January '07. It was a Delta 11-100 11 inch bench top model. Since I was drill press crazy, it was snapped right up. I really should have waited for a floor model but I was impatient to be able to drill holes and mortises. I cleaned it up but did not strip the paint as it was in pretty good shape and would be very hard to reproduce that speckly look. I was still very new to this old arn thing and not so inclined to do a proper and complete restoration of this drill press. It quickly qot a mortising chisel kit to complete the project. No sooner than I put it into service, two weeks after geting it, a Delta 15 inch drill press showed up on eBay and located in Milwaukee.
 Delta 15-207 inch drill press
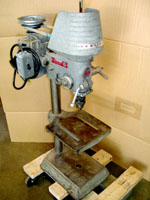
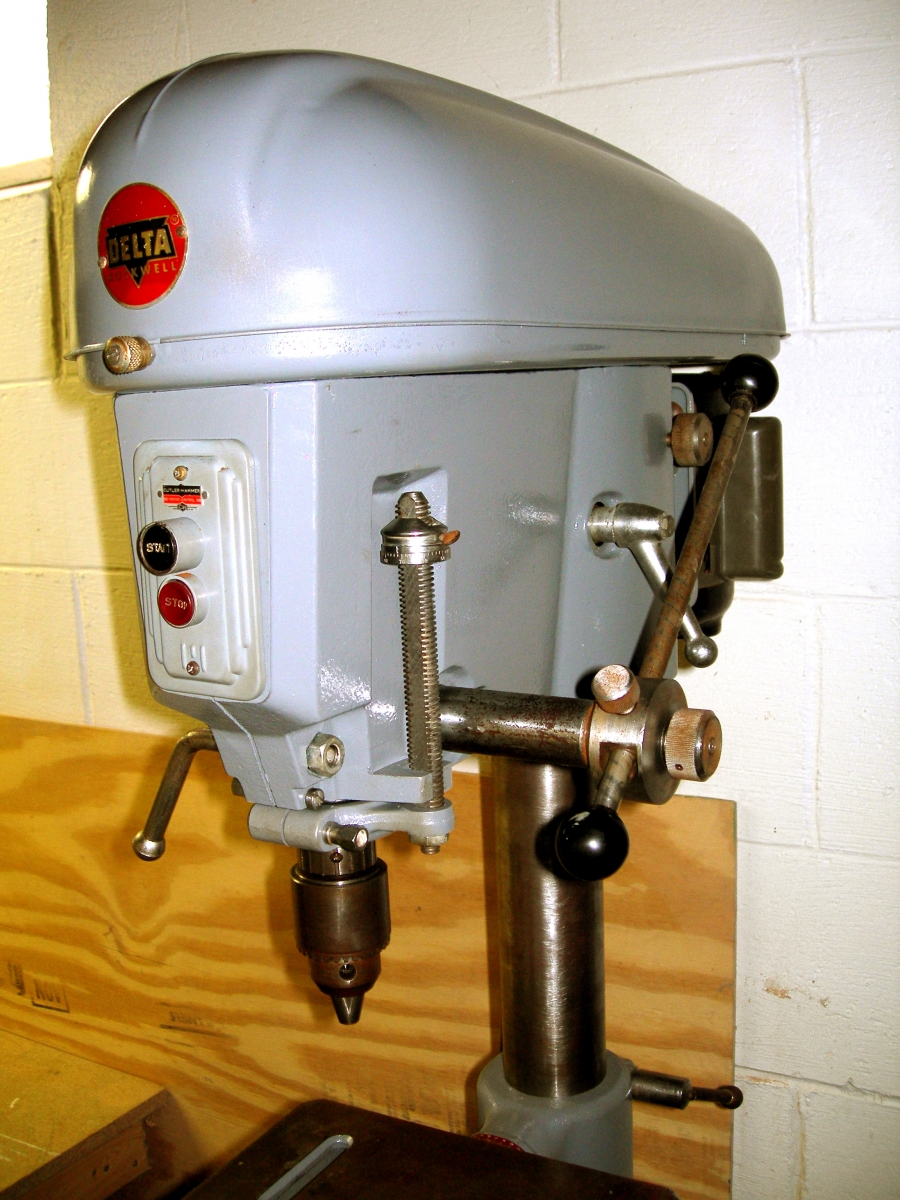
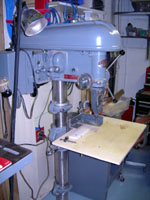
A very complete Delta 15-207, manufactured in 1950, the year my wife was born, was right there on eBay with a local pickup in Milwaukee, WI. How lucky could I be? Unfortunately the bidding went way over my desired amount so I had to go higher. In the end, I won the auction and the price was really fair. I was just hoping for one of those ridicolus deals you hear about.
The 15-207 was completely disassembled and each part stripped of paint and the grease cleaned off. Next each part was repainted and then reassembled. Lubrication was applied as required and the drill press was ready to test. The bearings seemed okay so I didn't replace them. To date, it has managed to perform all tasks put to it without any problems. The belt changing for each speed is very quick to do as well. This press quickly became a favorite and would eventually become one of two that would remain in the shop.
Delta 17-205 17 inch drill press
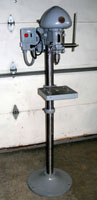
About a month later a Delta 17 inch drill press appeared on eBay and again it was located in the S. E. Wisconsin area. It was a Model 17-205 floor mount drill press manufactured in 1951. It was in bad shape with heavy blue paint even over thick greasy grime. That made those areas easy to de-paint! But this was the machine of my dreams, the machine that I never thought I would have again. The week of waiting for the auction to end was like when I couldn't turn 18 soon enough. I put in my last bid and went to bed hoping for the best but prepared for the hated email telling me that I had been overbid.
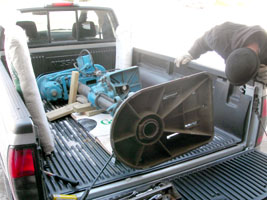 The new day started with the churning computer being wrested from it's sleep. The email program was started and in came the new mail. To my surprise, I won the auction and the drill press was mine. Now to arrange to pick it up. My son had offered the use of his new pickup truck to get it to my home. We met at the old machine shop where the drill press was, paid for it and watched as the forklift gently laid the press into the bed of the pickup truck. We had put some heavy cardboard down to protect the bed liner. The drill press was then blocked in so it wouldn't move during the trip home.
During the trip back, someone cut in front of the pickup truck and my son had to brake suddenly. The drill press shifted forward despite the packing. The rest of the trip went without further incident and we unloaded the press utilizing the dis-assembly process. That is where the machine is converted to smaller pieces for easier unloading. After all, it is a 310 pound machine! We soon discovered that the drill press had taken a bite out of the bed liner when it shifted. The bed liner was just short of being punctured. I felt really bad about that but my son said that someone had to be first to make his new truck not new anymore. His exact words were "you definitely struck the christening blow".
 The 17-205 went through the entire resto process including new bearings. It took many weeks to get the project done. During the resto, I was able to get my hands on a Repulsion Induction motor for it. This was like the cherry on top of the sundae. The motor was resto'd as well. It was a great day when the last part was assembled and the drill press was wired for use. As usual, it just hummed as if it was brand spanky new way back then. I let it run for ten minutes while my mind wandered back twenty some years, jumping from thoughts of mortising to thoughts of boring jewelry box trays. This beautiful drill press became the other press that would remain in the shop.
 About mid March of 07, I was offered a collection of parts that would make up a Delta DP220 14 inch Drill Press. I would provide a few hours of help setting up a computer network in a person's home in trade for the parts. I performed the work and received the parts which would eventually become my fourth Delta drill press. The machine was missing its serial number tag so I never knew what year it was manufactured. The drill press was stripped of paint and cleaned up. Next were repainting, reassembly and wiring. Upon completion, it looked nice and certainly was functional, but it somehow wasn't perfect with the missing serial number tag. In the end, this press and the 11 inch press were sold to help other machines into the fold.
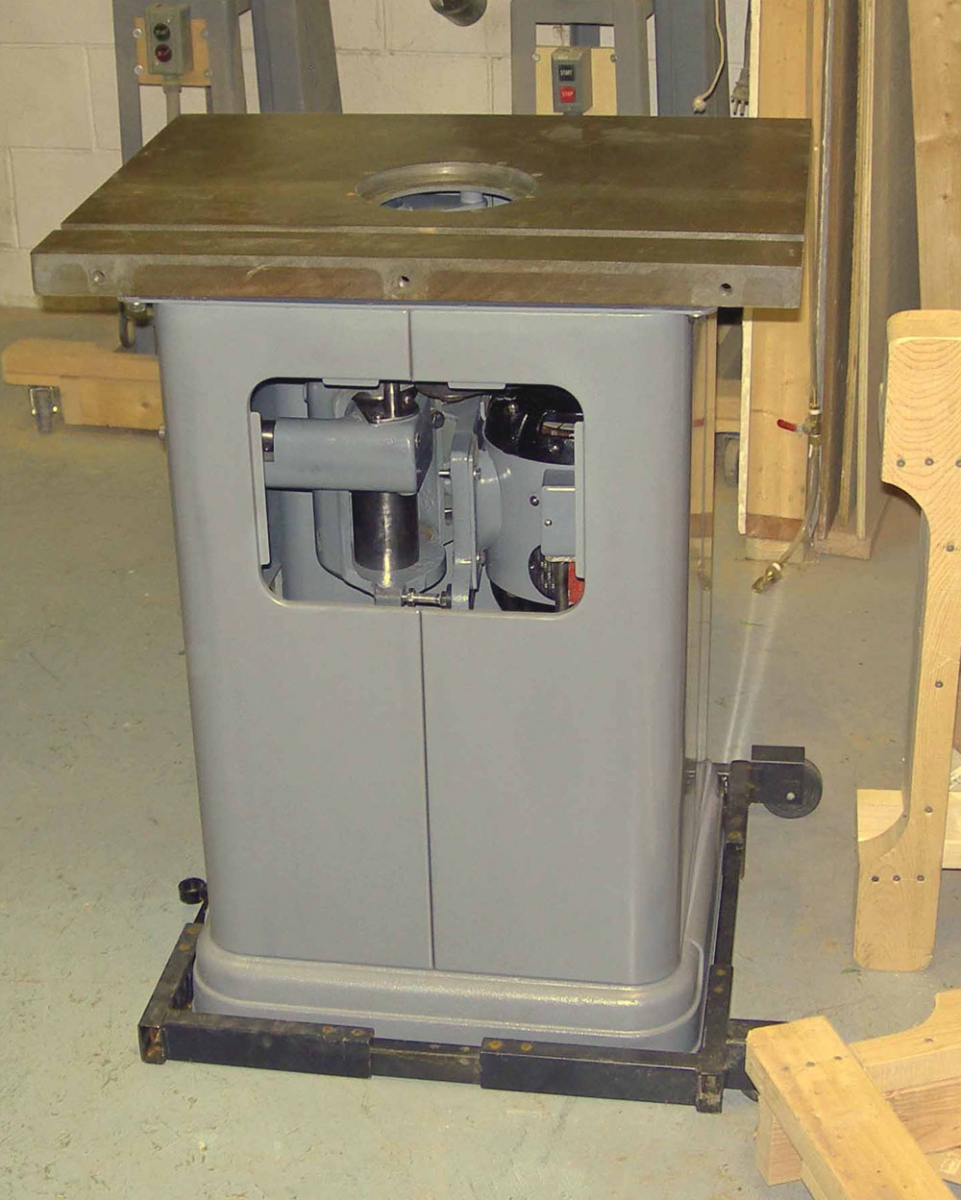
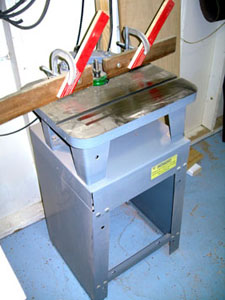 The next machine to appear on Craig's list, in late April, 2007, was a Delta Light Duty Shaper. It was a 43-120 manufactured in 1976. I offered less than asking and the offer was accepted. This was the first time I offered on a machine before seeing it. I drove almost two hours to pick it up. Upon seeing the machine I regretted the offer as the motor was missing its tag and all the belt guards were gone. The fella said it was a two horse motor. It came with the fence and one rusty cutter. I loaded the shaper and headed home.
This shaper went through the complete resto process including new bearings. I was able to pick up the guards affordably and upon the first spin it hummed like new. Having no idea what horse power this motor was I learned how to use an amperage meter to read the current drawn as the motor ran. I submitted my findings to the OWWM. The consensus was that the motor was around 3/4 horse power. So it is not as powerful as I would have liked but the light duty shaper won't be asked to do any heavy work.
In the old days I had a fairly complete set of cutters and rub collars and a cabinet grade Delta shaper. Now I have only the one cutter I bought after the shaper was returned to duty. The plan is to generate funds for more cutters by making things and selling them.
Update 2010-10-25
The LD shaper was replaced by a Delta 43-205 HD Shaper. The LD shaper sold quickly.
The Delta 43-205 HD Shaper came from a machine restorer in Chicago. It was a project that he lost interest in. Here is a video of me unloading the 350 pound shaper from my minivan.
 The shaper was put through the complete resto process. I had the spindle bearings replaced by a professional shop because of the nature of 10,000 RPM bearings. I did the motor bearings myself.
 In early May, 2007, a Delta 14 inch band saw appeared on Craig's list. It was a 28-290 (born in 1959) sitting on a CI (cast iron) base. My eyes popped out of my head when I first saw it. The base did not show in the listing picture nor was it mentioned. So I was quite in the rush to blurt out "I'll take it!" and get the man paid the very reasonable sum he had asked for. I slipped my hand truck under it and wheeled it out on the drive in preparation to disassemble it enough to get it into my vehicle. It was a heavy machine even in pieces.
It was entirely painted with blue paint!
As I disassembled the band saw the previous owner and his wife watched me load each piece. It didn't take long to get all of the parts safely into my vehicle. I bid the seller goodbye and drove home still very excited over this find. I never would have thought this would happen to me, a CI base under one of my restored machines.
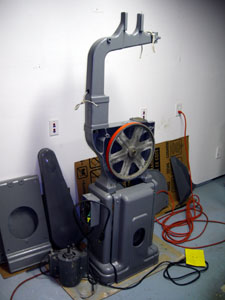
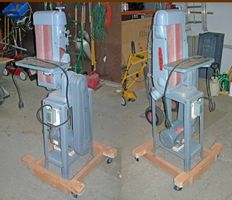
The beautiful CI base was not to be with me long as it became the focus of a trade for a Delta 6 x 48 sander, a machine that I felt was really necessary for the things that I wanted to do. I was able to find an enclosed base that would work on the band saw.
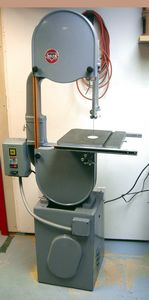 And thus the final result. It has a Black Cherry blade guard on the left and is powered by a Delta TEFC 3/4HP motor. Basic hardware was replaced with stainless steel hardware. The electricals have been upgraded to a magnetic motor starter.
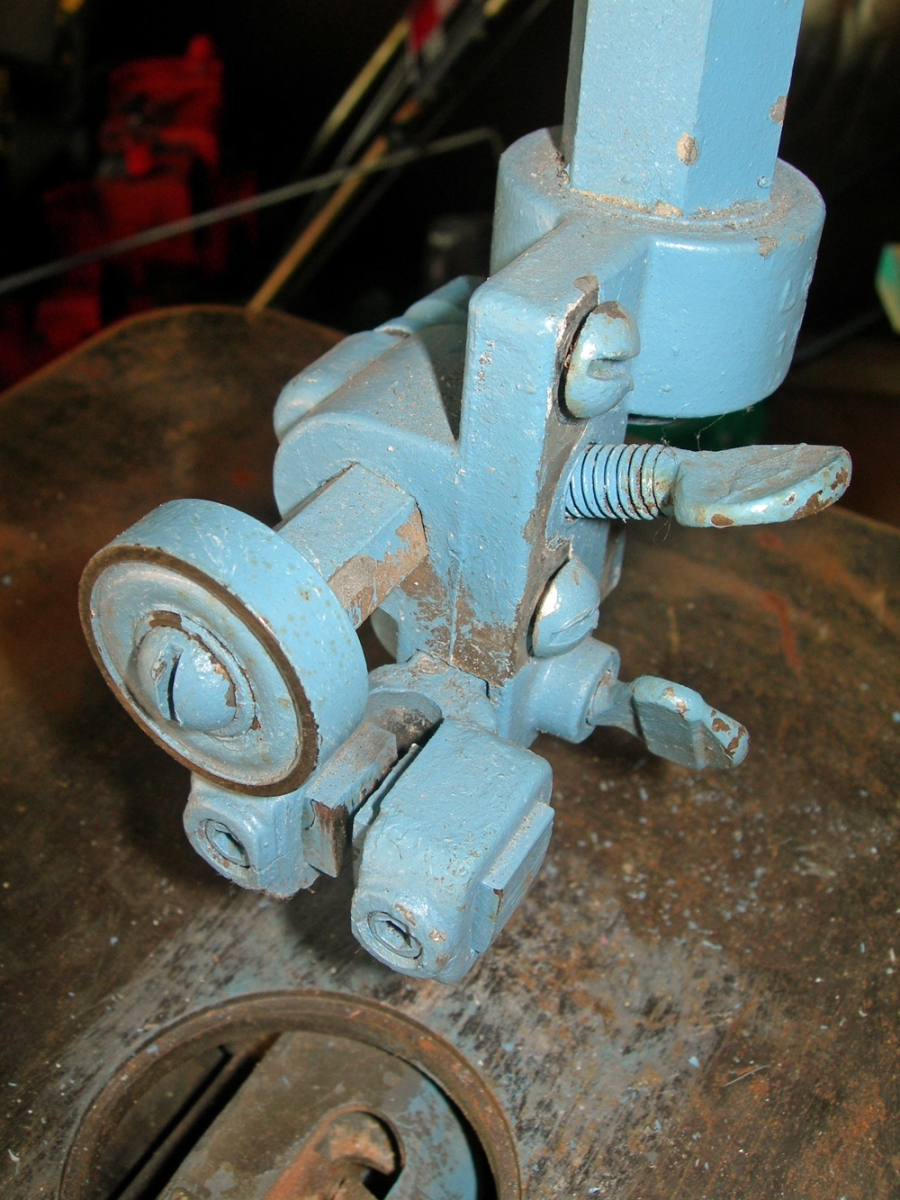
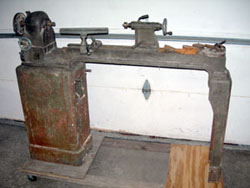 In early June, 2007, a Walker Turner 12 x 36 Wood Turning Lathe appeared on Craig's list. It too had a CI base but no identification tag. Its vintage (the 50's) had to be determined by its features as compared to lathes in old catalogs. It had the variable speed mechanism which I had not ever worked with. The lathe had been stored in an old single car garage and was quite rusty but still had all of the usual accessories. The seller graciously helped me take it apart and load it into my vehicle. It also is a heavy machine which my vehicle can attest to.
 During the long ride home I thought of all the things I did on a lathe in years past. Would I still have the guts to put a steel chisel to a piece of wood spinning so fast that it was just a blur?
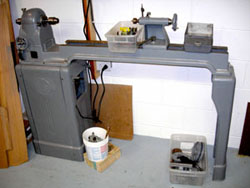
This machine went through a complete restoration and received all new bearings which is not easy with Walker Turner machines. Walker Turner chose to not use standard bearings in some of their machines and this lathe is one of those machines. To forever fix that problem, I had a machinist friend resize the shaft for a standard bearing. This is the second resto I did where all original screws, bolts, nuts, and washers were replaced with their stainless steel counterparts. As with the other CI base, the oval headed machine screws that were used in this CI base had their slots all lined up in the same direction as previously explained.
UPDATE 2010-10-30 - I haven't found the lathe useful in my current schedule so it was sold to make room for other machines.
UPDATE 2014-08-08 - WT utilized proprietary sized bearings in their machines. I suppose to insure future parts sales. Such a pain. I believe their bearings are .010 different than standard bearings. A machinist re-machined the existing parts to accommodate a normal sized bearing which was way easier to get and probably way cheaper.
These are the bearings that he used to determine his course of machining (2007 prices):
Head Bearings-Front 6205 ZZ NA @ 4.39ea Accurate Bearing $4.39
Head Bearings-Rear 5205 ZZ JF double row @11.40ea Accurate Bearing $11.40
From these bearing sizes you can determine what machining needs to be done. I do remember that he plugged the bore of the pulley and re-bored for the new shaft diameter.
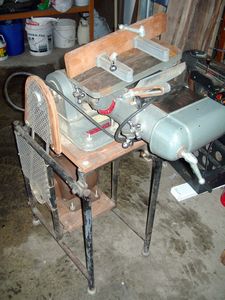
 Now I want to tell the story of my other cherished machine, the Delta 6 X 48 Belt Sander. This machine proved to be very versatile, in the old days. I had two of these sanders then, really nice when something had to be sanded through two grits.
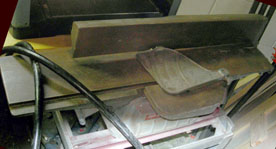
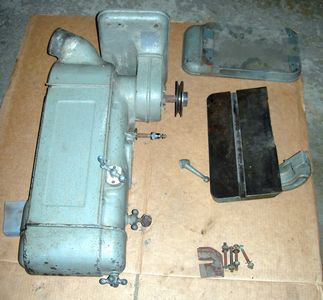
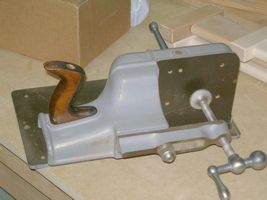
On about August 7, 2008, I was offered one of these machines in trade for that cast iron base mentioned above. I jumped at the chance to get my hands on a sander. It was a Model 1400 manufactured in 1946, which makes it a Milwaukee native. The picture shows the group of parts that arrived that day. I didn't know it then but this machine was in very rough shape. I would learn of all the things that can befall a 6 X 48 sander and how to overcome those 'dings' of time.
I had a very tough time removing the idler shaft from the idler assembly. The shaft had fused to the idler drum.
There is this small threaded part called a "bearing retainer" in the idler drum assembly that was found to have been rendered completely useless by the mis-use of a center punch during a prior repair. This is one of the few parts that I had to purchase from Delta ServiceNET. This part was very pricey for its size. The threads that hold this part, within the idler casting, were also gone causing the replacement of the idler casting at a cost just slightly more than the small threaded part.
The machine was assembled and the usual magnetic starter wired in. A short while later I was able to bring in a cast iron belt guard. Now that is really cool!
The platen of these sanders can get quite worn in those areas of contact with the part being sanded. The result is a depression that interferes with proper operation of the abrasive belt. The picture, here, shows such wear. The solution is to have the platen blanchard ground to restore its perfect flatness again. The next picture shows the result of blanchard grinding. To preserve the new flatness I apply graphited canvas and replace it as soon as I see enough wear. Using graphited canvas is much cheaper than replacing platens as they can only be ground once or twice before becoming too thin to use.
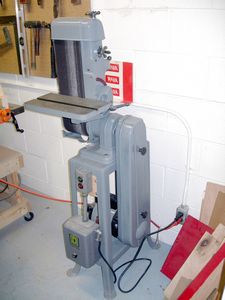
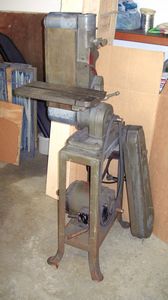
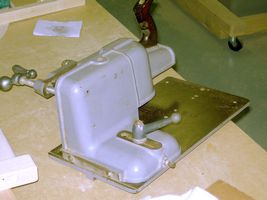
 In late January, 2008, Craig's List presented me with an opportunity to get another Delta 6 x 48 sander. Before I could get my rational "thinker" in gear, my arn-addiction said "I'll take it. When may I pick it up." On January 31, 2008, the sander was picked up while big fluffy snow drifted to the ground. The owner said that it had some accessories and if he could find them, they were mine. He then climbed up onto a bench and started to pull stuff out of a box on a high shelf. A wood fence with brackets appeared. Next a backstop with bracket appeared. He lifted the box down but the balance of its contents were of no interest. These accessories made this a very complete machine, less a Delta stand and motor. The picture on the left shows the before appearance of the sander and its accessories.
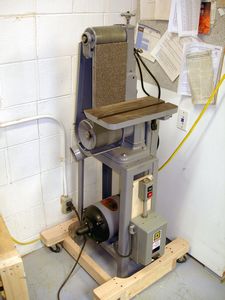
 I put this machine through a partial the restoration process; cleaning, de-rusting, and new bearings. The paint was in such good shape I decided to just clean off the dirt and let the original paint put forth its vintage glow. A magnetic starter was wired in. The platen of this sander had an ever so small derpession along the table; the rest of the platen still had the original grind swirls. I filled the depression with JB Weld and carefully sanded it level with the rest of the platen. Graphited canvas was then applied. I finally located the proper Delta splayed-leg stand to almost complete this machine. And a belt guard was located on OWWM leaving only the idler drum guard to locate.
 In early August, 2008, Ebay dangled yet another Delta 6 x 48 sander before my eyes. I placed a bid on it and watched, for days, as other bids drew closer to mine. The auction ended and I won. The god of Arn had smiled on me another time.
An hour and a half drive put me at the pickup place. It was then that I realized that this sander came with a Delta Repulsion Induction motor. Now that is a special treat. And it had a cast iron belt guard. The auction picture was not that clear. I dis-assembled the machine, loaded it with the help of the seller, and headed home.
I had bought this machine for the stand so the second sander would be complete. But the RI motor changed everything!
The sander was missing a few key parts for basic functionality. I found them and bought them.
 I put this sander and RI motor through the complete resto process and had the platen ground as it was in bad shape. I took the platen to the same place I had taken the other platen to last year. To my surprise a different company was in there now but they do the same kind of work. They told me they had bought out other company earlier in the year. They agreed to do the grinding and did a fine job.
A magnetic starter was wired in. The sander is ready for service.
In the old days I had two of these sanders in operation. Now I have three. It feels funny...........and special.
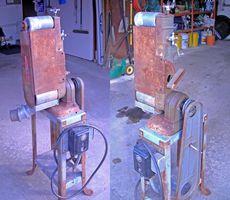 But wait! On April, 8, 2009 yet another 6 x 48 sander joined the crowd, a 31-305 manufactured in 1947. It is in the roughest shape of any of the sanders and will take considerable work to bring it back to shape. It is missing the table, idler drum guard and motor but came with a very rare 31-856 dust collector fitting and an A-B manual starter.
 I finished this restoration on Aug. 28, 2012. As you can see the sander started out missing quite a few parts. Over time the parts were acquired and restored bringing the sander to operational status.
This sander will join my son's shop.
1-23-2010 Sander #5 appeared on CL. For some reason I got a good deal on it. I bought it for the motor and other parts to complete #4. This machine was eventually sold for parts.
Delta 1172 Tenoning Jig (circa 1950)
The son used it for many years finally handing it off to me. I am so honored to be the current caretaker of this fine piece of arn!
Nostalgia
In early 1982, I had a very special machine made by Orv Phillips. It's job was to sand the slats used in my tambour (rolltop) creations. It could sand 60 slats per minute, through 120 grit and 220 grit in the same pass. It featured a graphited canvas platen on the 220 stage. The feed rate could be adjusted on the fly.
That machine has been returned (2010) to my possession from the same person who bought it when I sold my machines in 1986. Some critical parts of this machine were lost to a fire so I have my work cut out for me if I decide to restore this fine old machine. I have no notes from the original build so I am not sure of the DC drive system that was used.
UPDATE 2012-05-05 - On this day I disassembled the sander and took it to the village recycling center. It's restoration could not be justified within my current production environment. I tried to move it along it's life path by listing it on Craig's List, no interest was expressed. Soon, now, it will become part of another's dream.
A Story About Ball Bearings
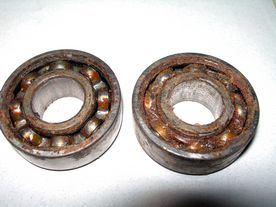 Let's take a moment to look at a pair of ball bearings that came out of a 50 year old Craftsman motor. The bearings, to the right, have grease that is the consistency of paraffin. It can no longer provide the lubrication that the bearings need. Some say that this can happen after just ten years from manufacture. The bearings will continue to spin and many a seller has said that the machine/motor turns freely as was the case with this motor. The motor just screamed and howled with these bearings.
If the bearings are allowed to spin without proper lubrication they become galled and pitted. This condition can lead to the seizing of the bearing causing the races to spin inside their mounting or around the shaft itself. Once this occurs replacing the bearing requires machining new mounting surfaces which will certainly be more costly than replacing the bearings in a timely manner.
More Information Bearing Lifespan. Click CANCEL if prompted for password. Of course, registering for this wiki may prove useful.